


The following is a quick overview of all the steps required to build your Thinkspace Site.
Click on the links below for more information about each step.
STEP 1: Create your Thinkspace Site

Login using your CSU Login details and follow the steps to create a Thinkspace Site.
To create your site:
- Visit the Site Creation page to create your first blog – http://thinkspace.csu.edu.au/wp-signup.php
- Give your site a name and a title, select language and privacy options, and then click the ‘Create Site’ button.
STEP 2: Apply a Theme from the Thinkspace Themes Collection
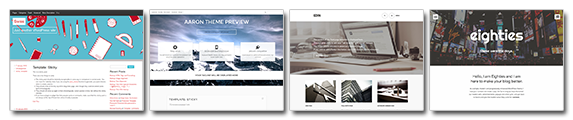
Select a theme that meets your design needs and apply it to your Thinkspace Site.
To select your theme:
- Visit the Thinkspace Dashboard
- Rollover the Appearance button in the menu on the left of your dashboard and choose ‘Theme’
- Select a theme (design) for your site from the collection (there are more than 200 to choose from!)
- Click the ‘Activate’ button to apply your chosen theme to your Thinkspace site.
STEP 3: Create a new page and customize site settings to setup your Home Page

Your default site will be setup like a blog, with your front page displaying your latest posts.
However you can create a home page and set it as your static homepage to achieve the look and feel of a traditional website.
To setup your home page:
- Visit the Thinkspace Dashboard
- Rollover ‘Pages’ in the menu on the left of your dashboard and choose ‘Add New’
- Give your Homepage a name (eg Home) and click the ‘Publish’ button
- Return to the Thinkspace Dashboard
- Rollover the ‘Appearance’ in the menu on the left of your dashboard and click on ‘Customize’
- Choose ‘Static Front Page’ from the Customizing options on the left and set your site to ‘A static page’ and select the Page you wish to set as your homepage.
If you are planning on including a blog on your site, repeat these steps to create a page to display your blog.
STEP 4: Customize your theme’s features

Each Thinkspace theme has a variety of options you can customize to create an individual look and feel.
This could include: Header Image, Background Image, Fonts, Colour Scheme, Page Layouts, Featured Post settings and various other options.
To explore and customize your theme’s options:
- Rollover the ‘Appearance’ button in the menu on the left of your dashboard and choose ‘Customize’
- Explore and choose your theme’s settings to create your desired look and feel.
STEP 5: Create your site’s page structure and menus

Add the pages you need for your site. You may need only 1 or 2 extra pages, or many. You can create as many as you like, and even organize a hierarchy of ‘parent and child’ pages.
When you’ve added your main pages, setup your site’s Menus to create useful navigation. Most themes have at least one navigation menu you can customize (sometimes two or three!).
To create your site menus:
- Rollover the ‘Appearance’ button in the menu on the left of your dashboard and choose ‘Menus’
- Use the Menu tools to add and order your pages into a useful navigation menu
- Select Menu Settings to set your theme’s Primary (or Secondary) menu.
STEP 6: Choose Plugins
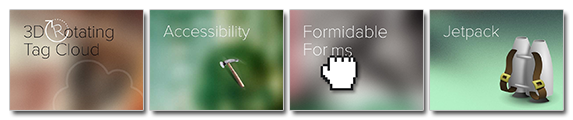
Plugins extend and expand your site, and can be used to add a range of useful features. Thinkspace has more than 40 plugins to choose from.
To select and enable plugins:
- Rollover the ‘Plugins’ button in the menu on the left of your dashboard and click on ‘All’ to view the available plugins
- Explore the details of a range of plugins that add features and select the right ones for your site
- Click on the activate button to activate your desired plugins
- Customize settings for your plugins as required (varies from plugin to plugin, please view ‘Plugin Help’ for more information).
STEP 7: Setup Widgets

Widgets allow you to add tools or content to your site’s page sidebars. They add additional functionality or information. Each theme has different options in terms of where widgets appear on your site.
To setup widgets:
- Rollover the ‘Appearance’ button in the menu on the left of your dashboard and choose ‘Widgets’ to view the Widget editing tools
- Drag and Drop the widgets available into the desired sidebar
- Configure each widget as required, and click save and close.
Congratulations! You’ve completed the basic steps of creating a website using CSU Thinkspace!
For further info and detailed guides, check out the Getting Started, Setting Up Site Features and Resources sections where you will find lots of useful information to assist you in creating your new website.
