
As discussed in the thread Design Brief: real experience; I wanted to share the design briefs and final construction following our conversations.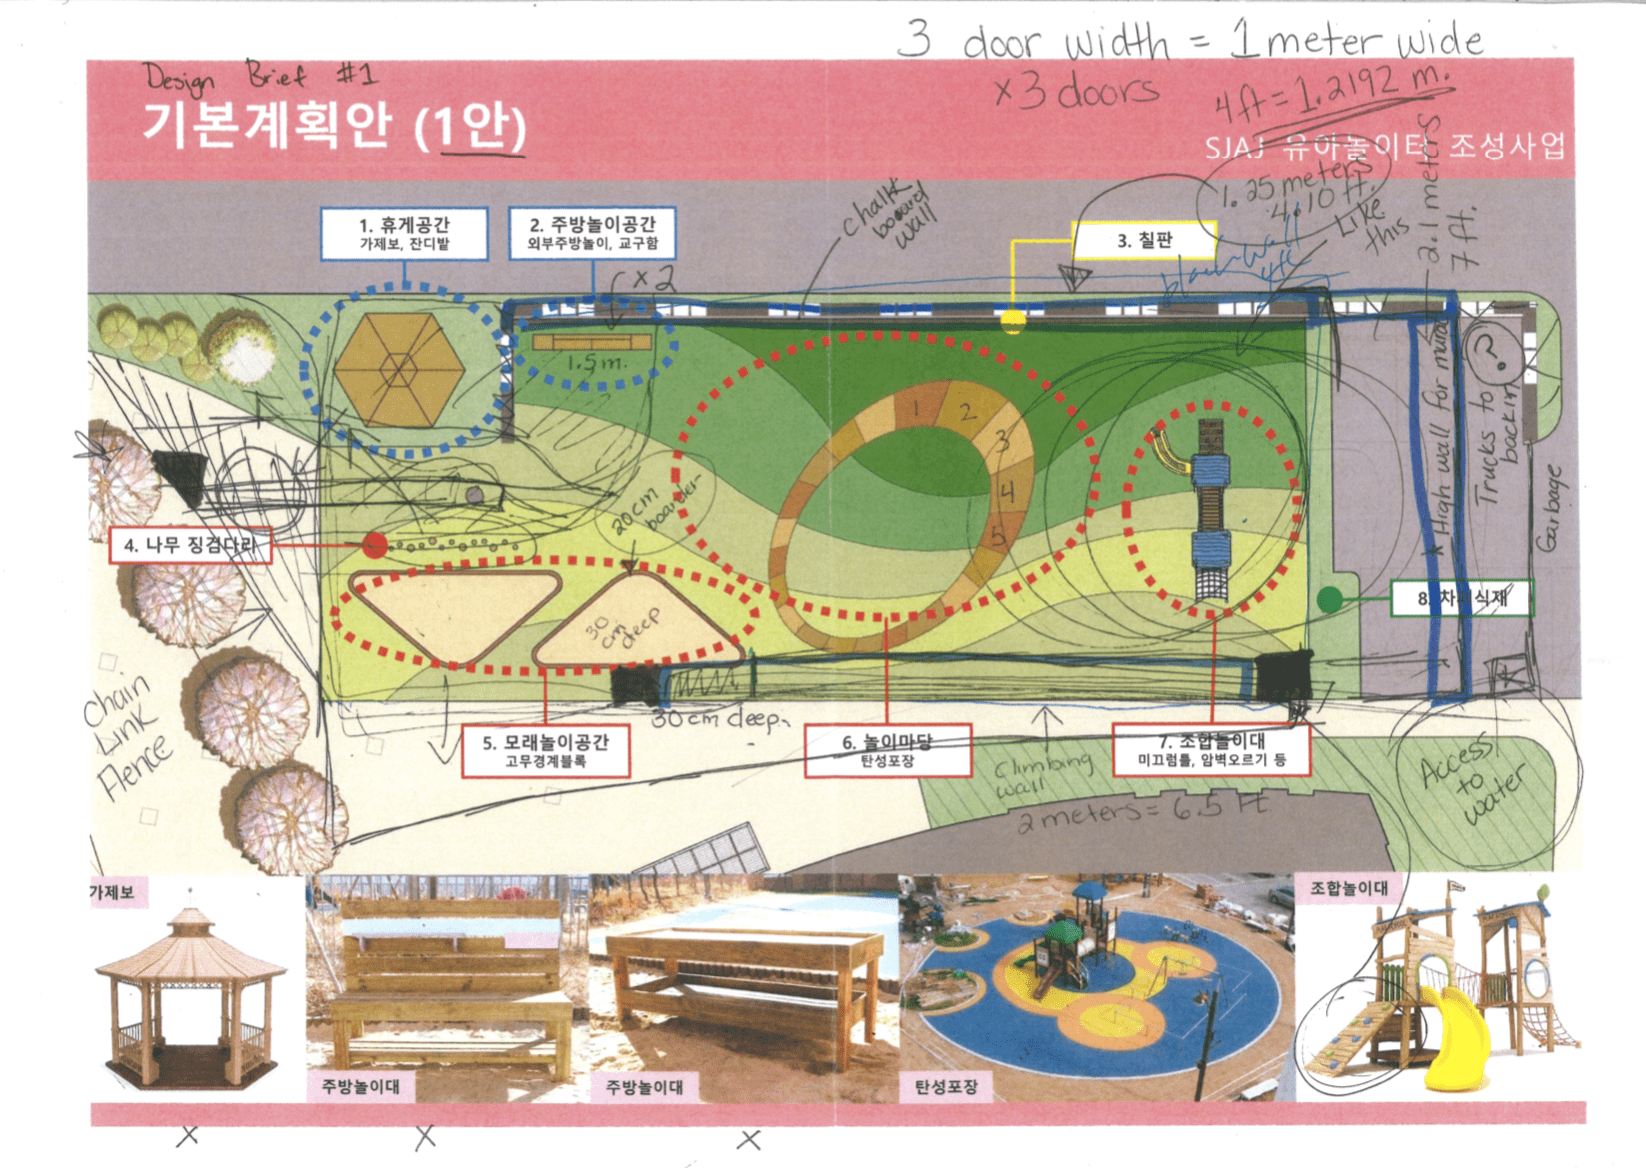
This was the design brief provided to us following an initial brainstorming meeting. We were provided with 2 options and chose this design to add our ideas to, as you can see the pen scribble. These add ons came throughout an informal discussion. You will see in the following revised design brief that a lot of our ideas and changes were adhered to!
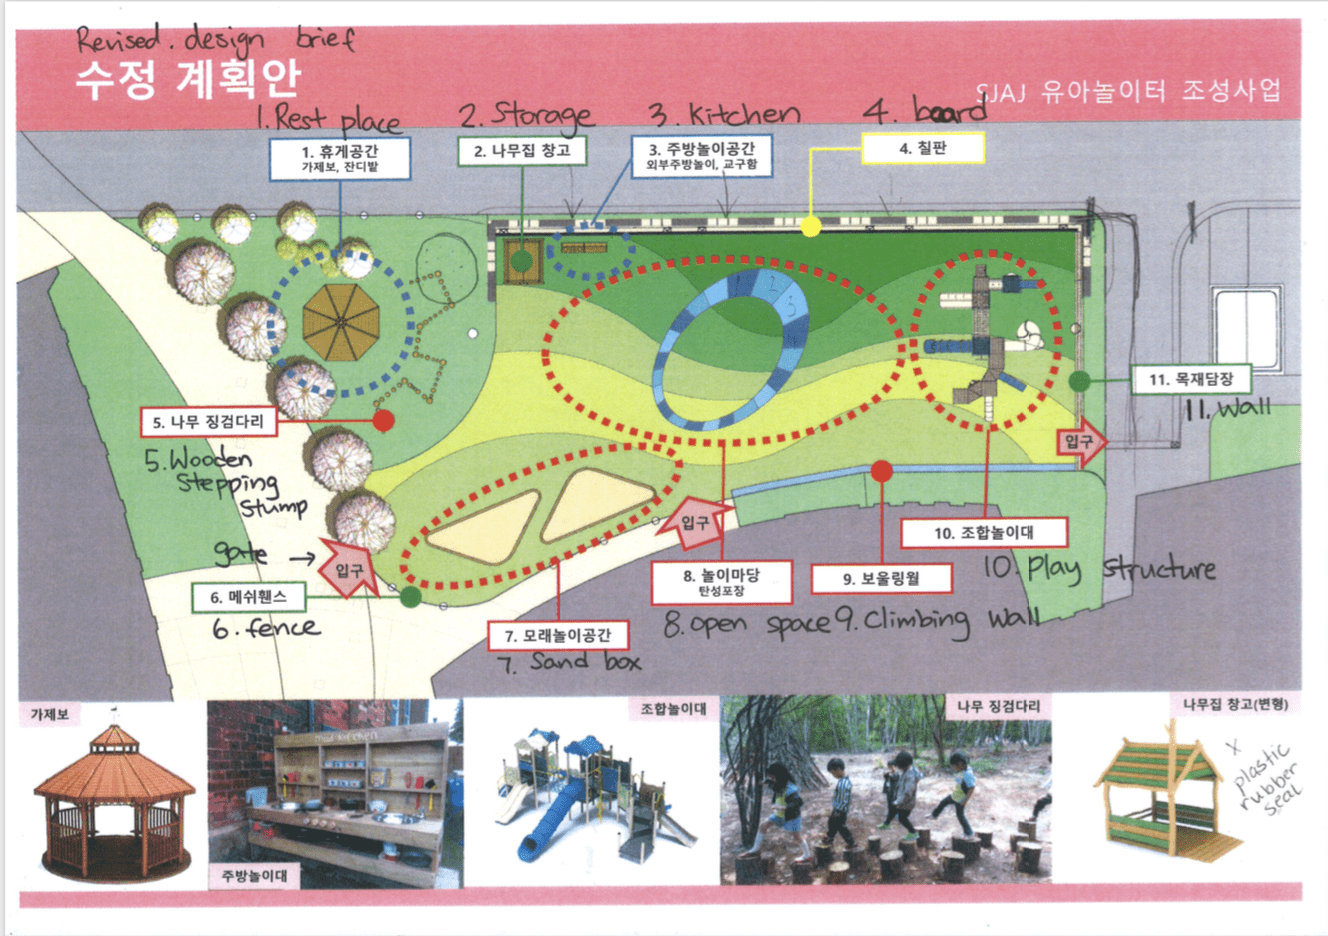
You can see that the main changes are:
- The area was enlarged on the left to become wider and angled in the hopes of providing more open space.
- A natural space was provided (top left) along with the gazebo/rest space.
- More entrances/exits were added (red arrows).
- The colour scheme of the centre circle was changed and numbers were added to it.
- A larger and more complex play structure is used.
- A climbing/bouldering wall is added (label 9, blue wall bottom right).
It was excellent to me that, as a committee of teachers, so many of our ideas were listened to and followed through on. This was my first time interacting with design briefs and I’ve found them to be an extremely useful tool in the design process.
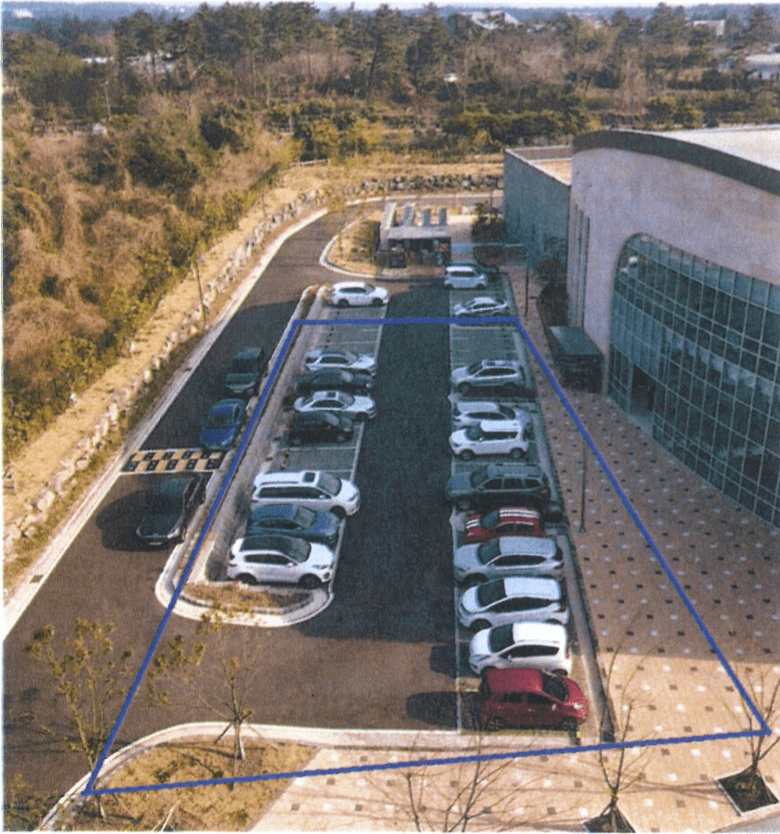
Below: Before shot of the area chosen to build the new playground.
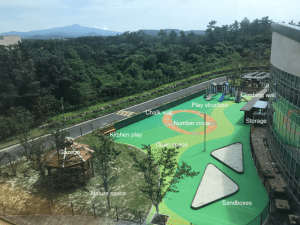
Below: The final completed construction with labels (*note this after shot is taken from a different angle).
 You can see more photos on my teaching Instagram profile @grade1ries.