EdTech Global

Developing a global understanding of educational technology

Tag: KNA

Part 2 | Making a Connected Learner: Screencasting

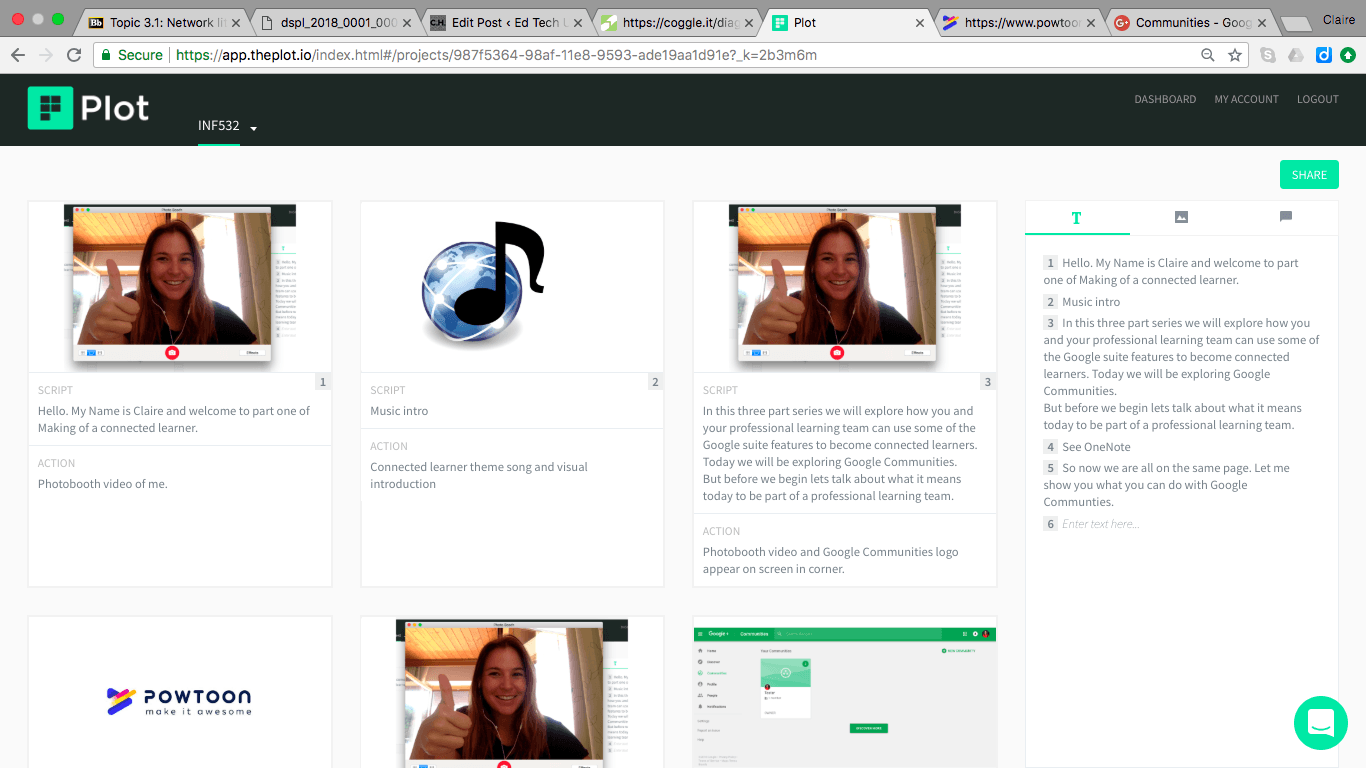
Recap: I am working on creating an instructional video about how to use Google+ Communities for teacher PLN’s. I have storyboarded the production using The Plot and am now starting to piece together the video, screencast and PowToon. I am also required to write an  exegesis about my creation so I am on a strict timeline to get the project finished as I am a notoriously slow writer. Read more about the project here.

Today’s task is to film the introduction video using Photo Booth and record the first screencast using QuickTime Player screen recorder.  I have used screen recording or screencasts before in flipped classroom settings and found the process to be somewhat stressful, especially when keeping to tight time frames. Students tend to loose interest when you spend too long typing or waiting for the page to load.

It has taken me seven attempts but I have finally recorded the first screencast demonstrating how to create a new community, add new members and edit community details. Using QuickTime Player was easy! Open the program > File > New Screen Recording. After pressing the record button, select the part of the screen you want to record and begin.

Now I will be honest, the reason I used QuickTime Player was because it was already installed on my computer. However there are several other programs that you can use that do the exact same thing such as Screencastify and Snagit. Check our Fractus Learning and their article 7 Of The Best Screencasting Software Tools For Classrooms for more ideas.

Finally here are my Top 5 tips for educators creating screencasts.

  1. Clear your desktop. We don’t need to see the 38 files sitting on your desktop.
  2. Delete browser history so it does not appear when you are typing in URL’s. Could be awkward.
  3. Practice, practice, practice. Know where you need to move the mouse on the screen before recording. Time can be wasted moving  around the screen unnecessarily.
  4. Use a mouse when scrolling down pages.
  5. Make sure you stick to your initial learning objective. Try not to go off on tangents. Stick to the script.

Need some more inspiration? This proffesor is a legend.

Part 1 | Making a Connected Learner: The Plot

“Under the direction of leadership at my school we are required to be active members of “Professional Learning Committees” or PLC’s. We have seven committees that cover topics such as numeracy, literacy, science, humanities, technology, community partnerships and student wellbeing. Each PLC is required to stay up to date with their relevant area, provide peer learning sessions and act as a “first port of call” for classroom teachers.

I propose to make an instructional video on the importance of accessing PLC’s online and how committee facilitators and members can use Google+ Communities as a platform for engaging and contributing to PLC’s.

I believe networking platforms such a Google+ Communities need to be used in conjunction with other tools so I would be creating this video as part of a three-part YouTube series that would cover other synchronous and asynchronous tools for networking such as Google Hangouts/Meets and Classroom.”

This is my proposal for my INF532 knowledge artfeact. Today I received tick of approval from my lecturer to proceed with the creation. I have four week to create an artefact that explores learning networks and ways to  be a connected learner. In addition I will be writing an exegesis that uses research to justify my design choices as well as the using current literature to provide a theoretical background.

My next step now is to storyboard my video ready for production. I will be using The Plot an online storyboarding tool to map out the different tools I will be using, including Photobooth, PowToons, iMovie, Quicktime Screencast and Quicktime Voice recorder.

This is the storyboard so far.

I really like using Plot as a storyboarding tool. It’s a well designed and simple tool, allowing users to create and move scenes around a grid. In each scene you can choose to include an image, script and action details. My favourite feature so far is the text pane sidebar. It reminds me of Microsoft’s SmartArt feature where text can be entered either into the diagram or the text pane. I think this promotes fluidness and focuses on the narration and dialogue of the video.

I know from using PowToons before that the site suggests creating and narrating a script first before adding animations. In this regard, Plot and Powtoons go hand in hand and definitely recommend to anyone creating a PowToons to consider using Plot to plan the animation.

One feature that I have yet to use is the collaboration tool. If working in a team you can add team members to the storyboard so you can work collaboratively without even having to talk to them.

© 2024 EdTech Global

Theme by Anders NorenUp ↑

Step 1 of 2
Please sign in first
You are on your way to create a site.
Skip to toolbar